
In this SAP SD tutorial, we will talk about scheduling agreements in SAP Sales and Distribution. You will learn what SAP SD scheduling agreements are used for and how to create them. We will provide screenshots and guidance that are relevant for this process.
Outline agreements play an important role in nearly all business processes. Customers and vendors agree on the goods to be provided under certain conditions and within a specific period of time. Outline agreements streamline business processes for both partners in a business relationship.
The two main outline agreements, which are:
A scheduling agreement is an outline agreement between you and a sold-to party that is valid for a certain period of time. The scheduling agreement contains fixed delivery dates and quantities. These dates are contained in the schedule lines for the scheduling agreements. Once the scheduling agreement is due for delivery, you can create the delivery as normal or by using a delivery due list.
When you enter schedule lines for an item in the scheduling agreement, the system adds up the quantities that have already been entered and compares them to both the target quantity and the quantity already shipped. This gives you an overview of all the open quantities.
If the quantity in the schedule lines exceeds the target quantity, the system issues a warning message. If the customer requires it, you can process invoices periodically – for example, once a month. All deliveries due for the billing document are combined in a collective invoice.
Standard SAP SD scheduling agreements normally contain:
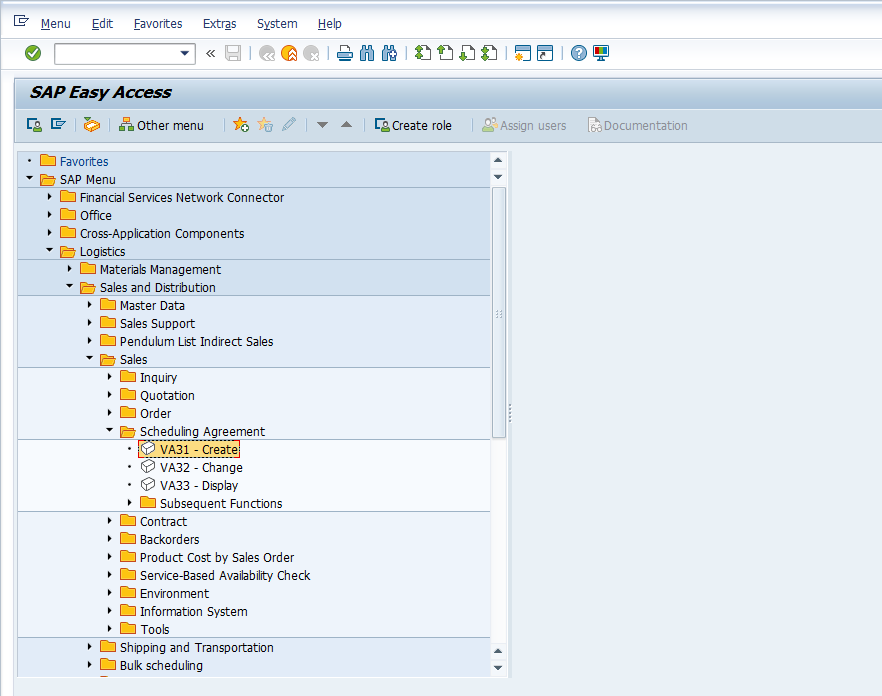
There are two options to start the process of creating a scheduling agreement:
 Enter VA31 Transaction" width="201" height="71" />
Once you have entered the Scheduling Agreement: Creation Initial screen, you have to select relevant Scheduling Agreement Type. Each Scheduling Agreement Type has its own functionality and viewing based on the configuration done at the backend of SAP system.
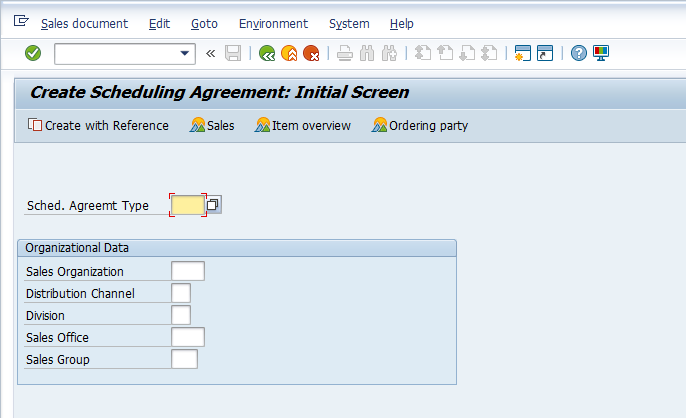

Please note, any field having a ‘tick mark’ means its mandatory and it has to be populated else the SAP system would not allow you to proceed further. In order to opt for a required scheduling agreement type, press F4 on the respective field and it will show all LoVs (List of Values) with available types of scheduling agreements.
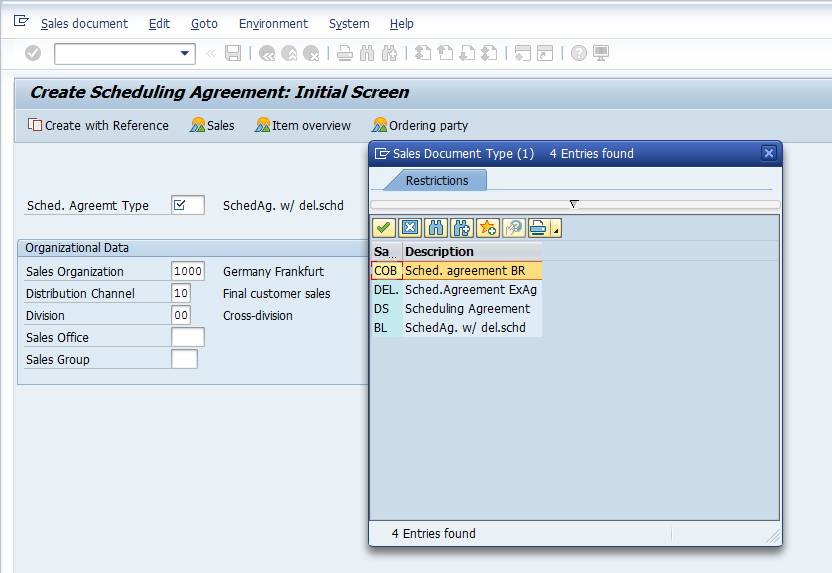
Select the relevant Scheduling Agreement Type to proceed to the next step.
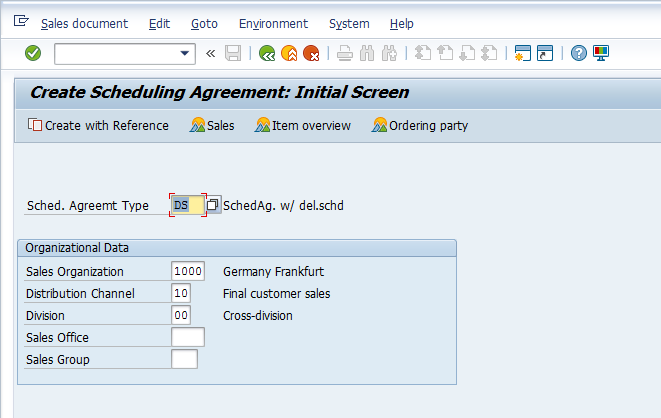
Populate Organizational Data with your relevant Sales Organization, Distribution Channel and Division.
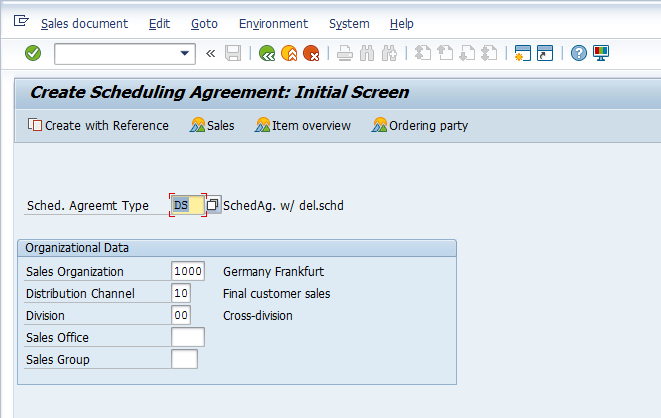
Hint: if you populate your relevant Sales Organization, Distribution Channel and Division first and then opt for the relevant Scheduling Agreement type, only Scheduling Agreement types relevant for the selected Sales Organization, Distribution Channel and Division will be displayed in LoVs.
The following master data is involved when creating a scheduling agreement. This master data fetches relevant information and populates the relevant fields accordingly:
On the screenshot below is the initial screen of Scheduling Agreement once you have selected the relevant Scheduling Agreement Type and Sales Area (combination of Sales Organization, Distribution Channel and Division is technically termed as Sales Area in SAP SD).
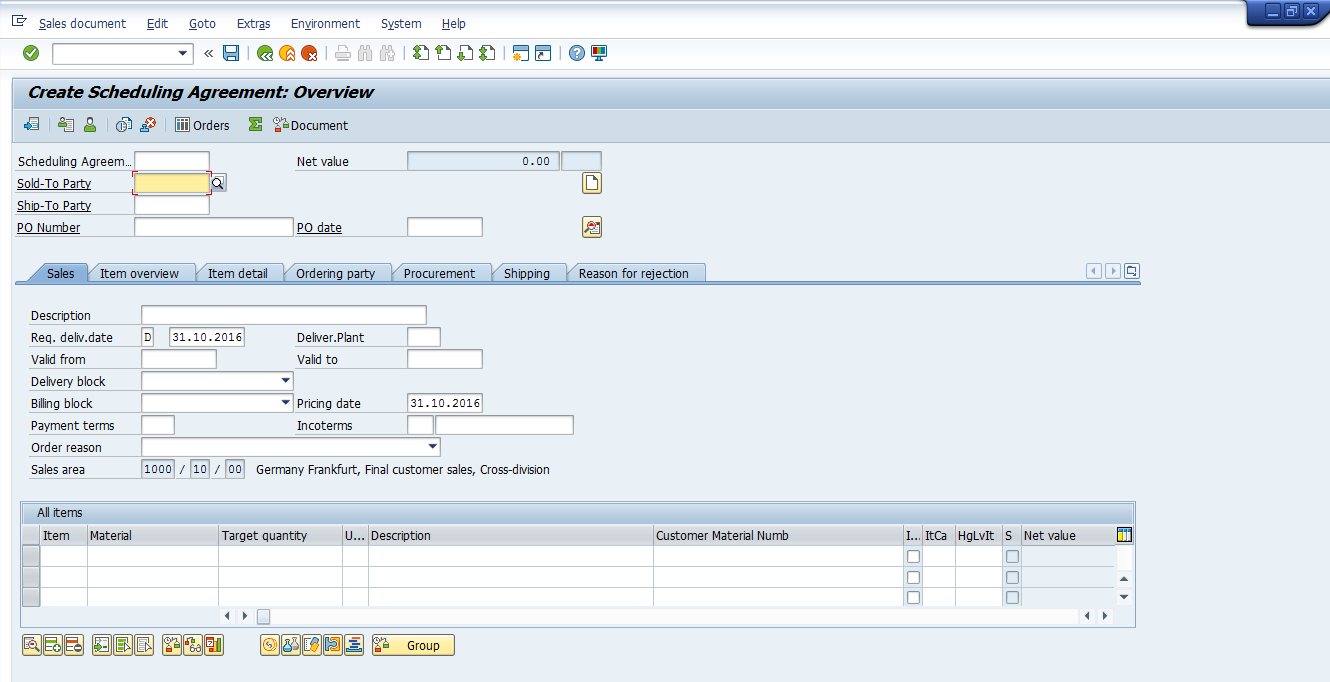

You can see Sold-to Part and Ship-to Party fields at the top left of the screen. One Sold-to Party can have multiple Ship-to Parties. If there are many Ship-to parties associated with one Sold-to Party, a dialog box will pop up in the scheduling agreement screen. You need to select the relevant Ship-to Party which the Sold-to Party has instructed you to ship the products to. Press F4 or button on the Sold-to Party field to search for your relevant Sold-to Party.
You can search by Search Term maintained in the customer master data or also by Name. To remain specific with your search, enter relevant Sales Organization, so that only customers maintained in your sales organization will be displayed. If you decide to find the customer with name, enter customer’s first name with * before and after the name. This is called wild card search.
Here we are using ‘Search Term’ functionality:
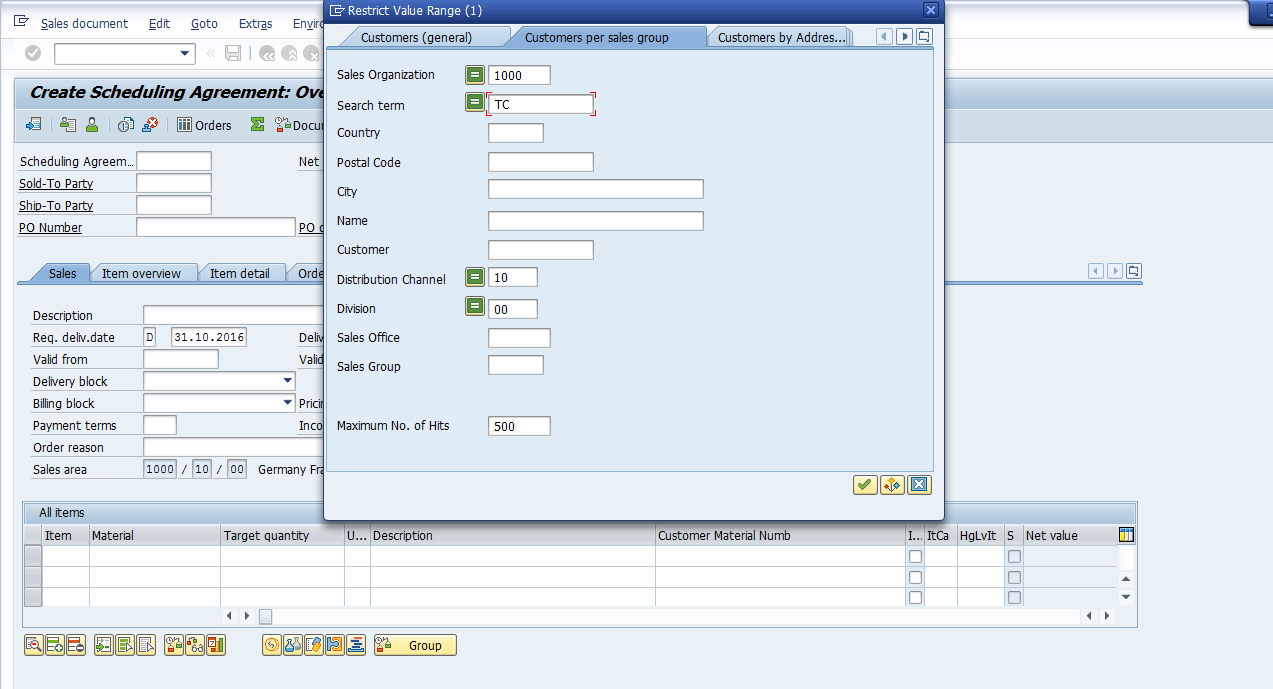
Hint: You can use asterisk to be more specific in your search and press Enter to get output of your search.
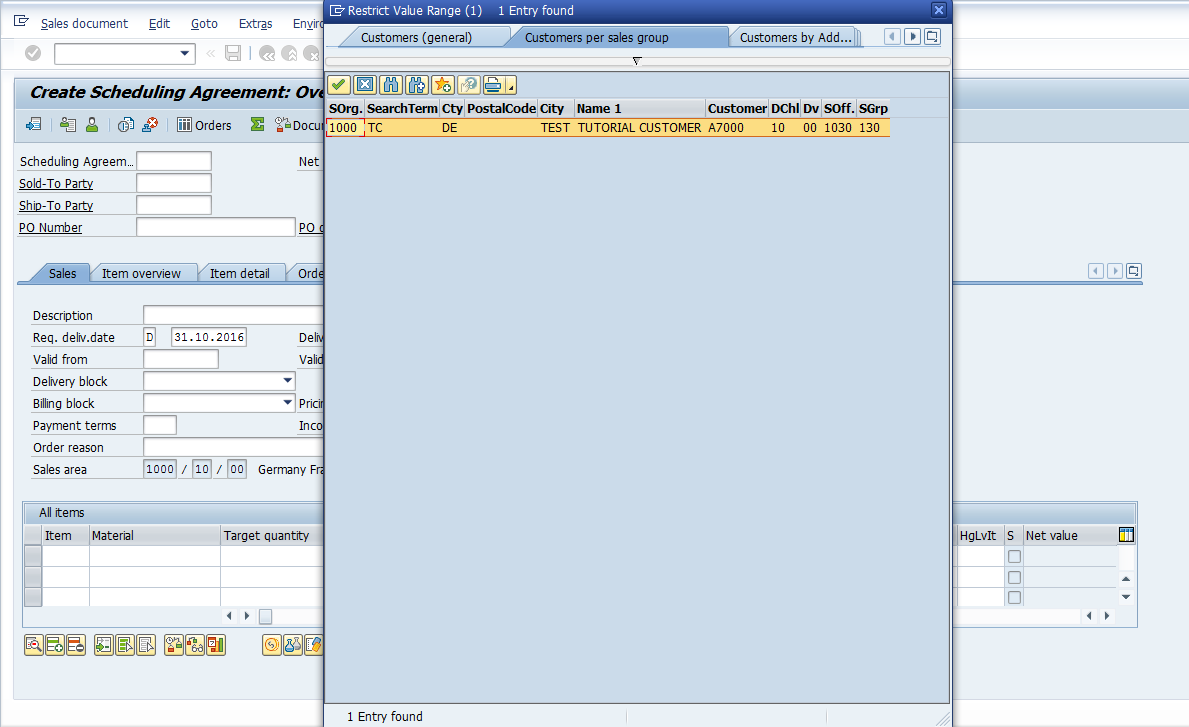
Double click on the required customer line in the window to select that customer.

Press Enter once you have selected the Sold-to Party, so that the SAP system can accept the customer and proceed with the scheduling agreement creation. If the customer has two Ship-to Parties assigned, a dialog box will be popped up to select the relevant one which your customer, Sold-to, has instructed. Double click on the required one and the same will be selected.
If there’s only one Ship-to Party assigned to the Sold-to Party, once you press Enter, Ship-to Party will automatically get populated.
Since a scheduling agreement is a legal document, the system will prompt you to populate validity dates:
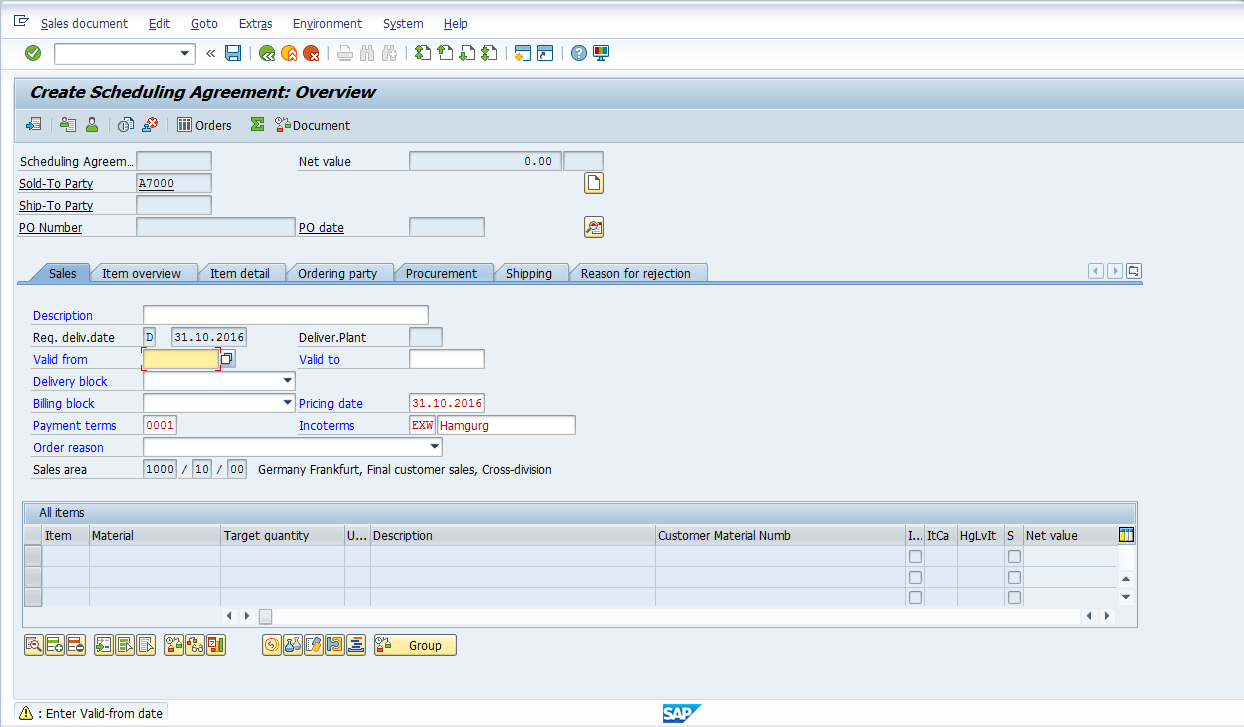
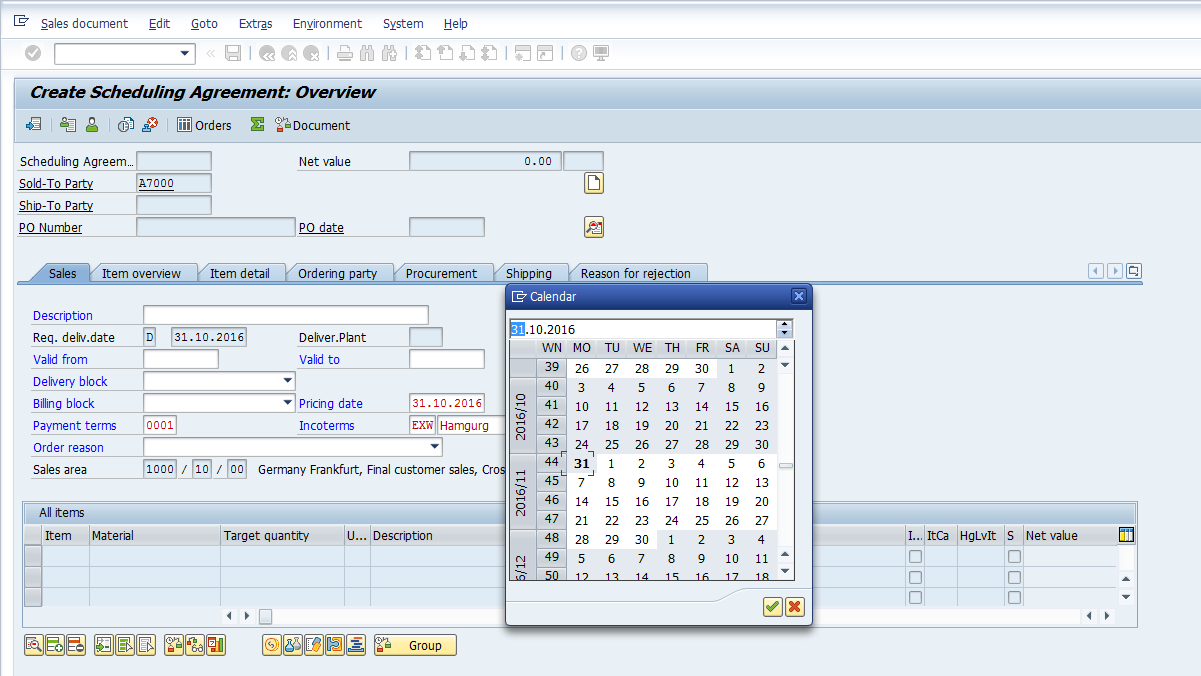
Populate scheduling agreement validity dates, i.e. ‘Valid From’ and ‘Valid To’ dates:
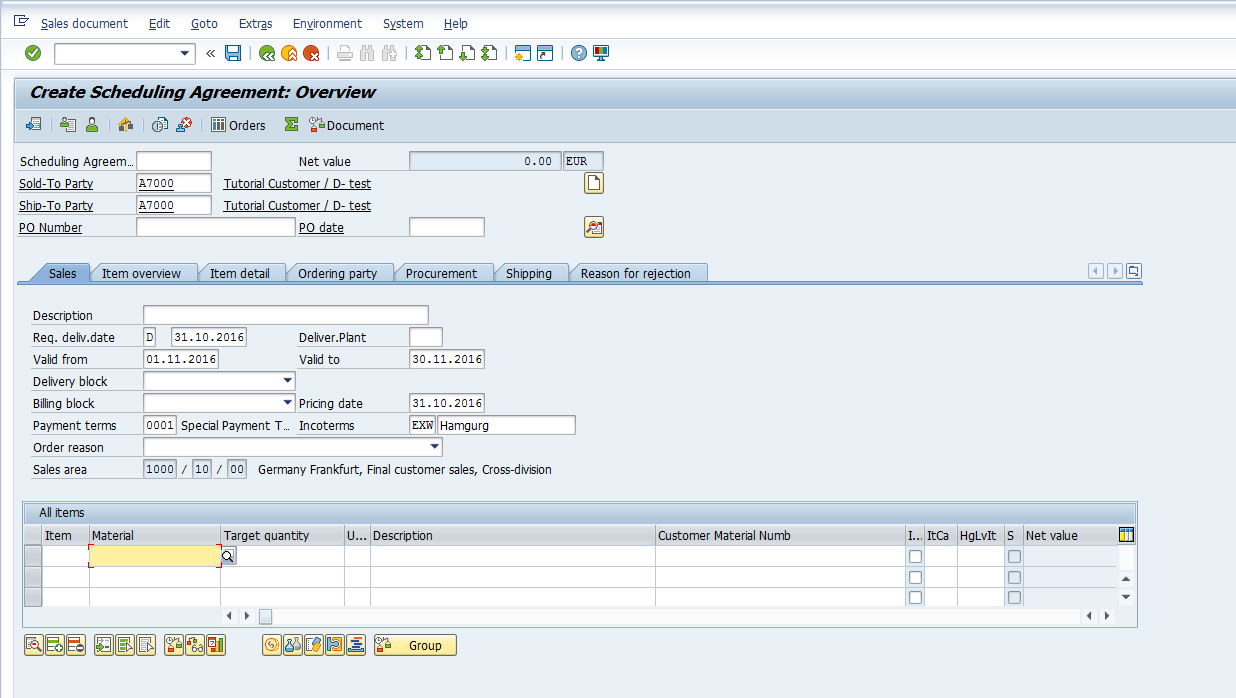
This part is called header of the scheduling agreement:

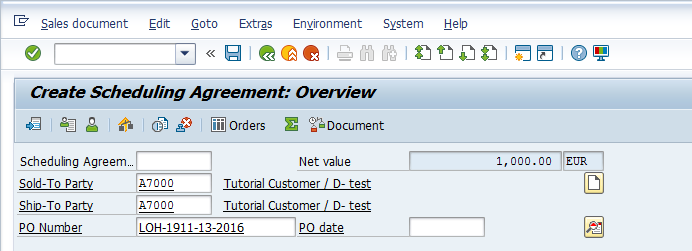
This part is called overview of the scheduling agreement:

This is called the line item part of the Scheduling Agreement where materials which are inquired by the customer are to be maintained:

Use F4 to search for the material the same way we did for the customer and repeat the same process for entering multiple line items (if required).
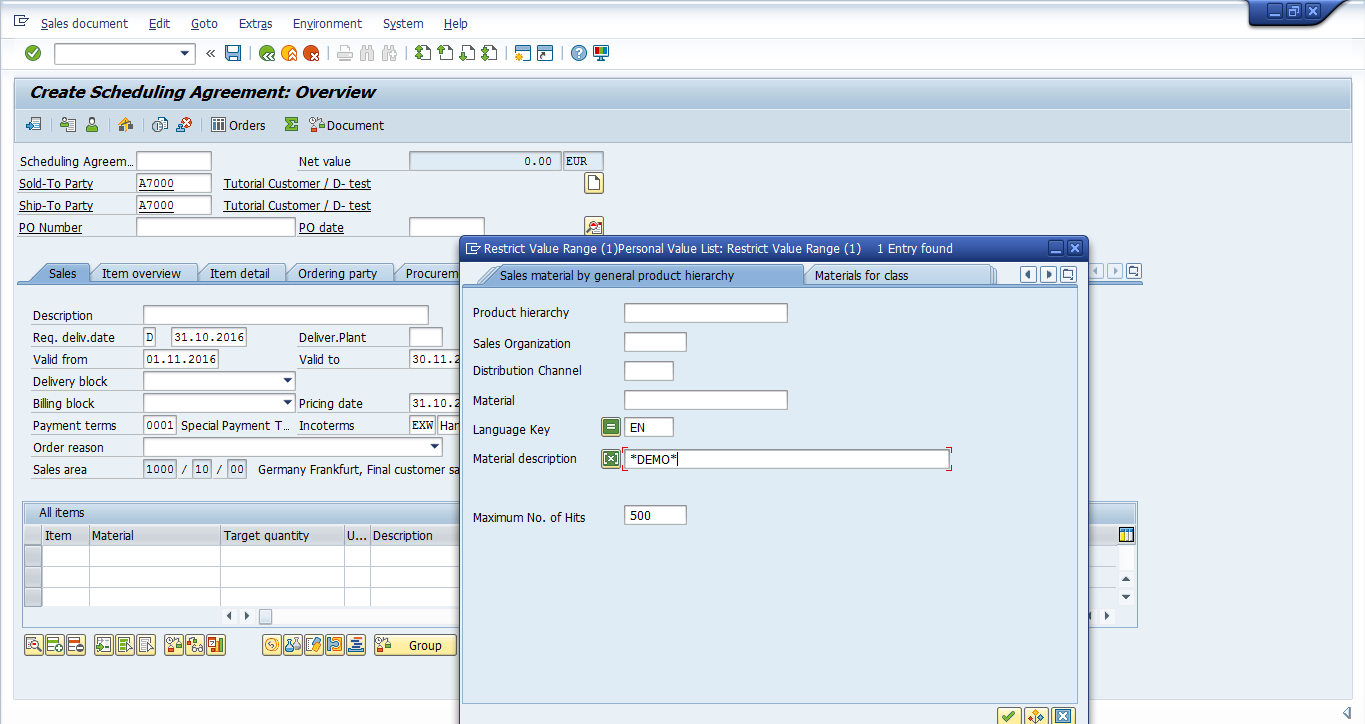
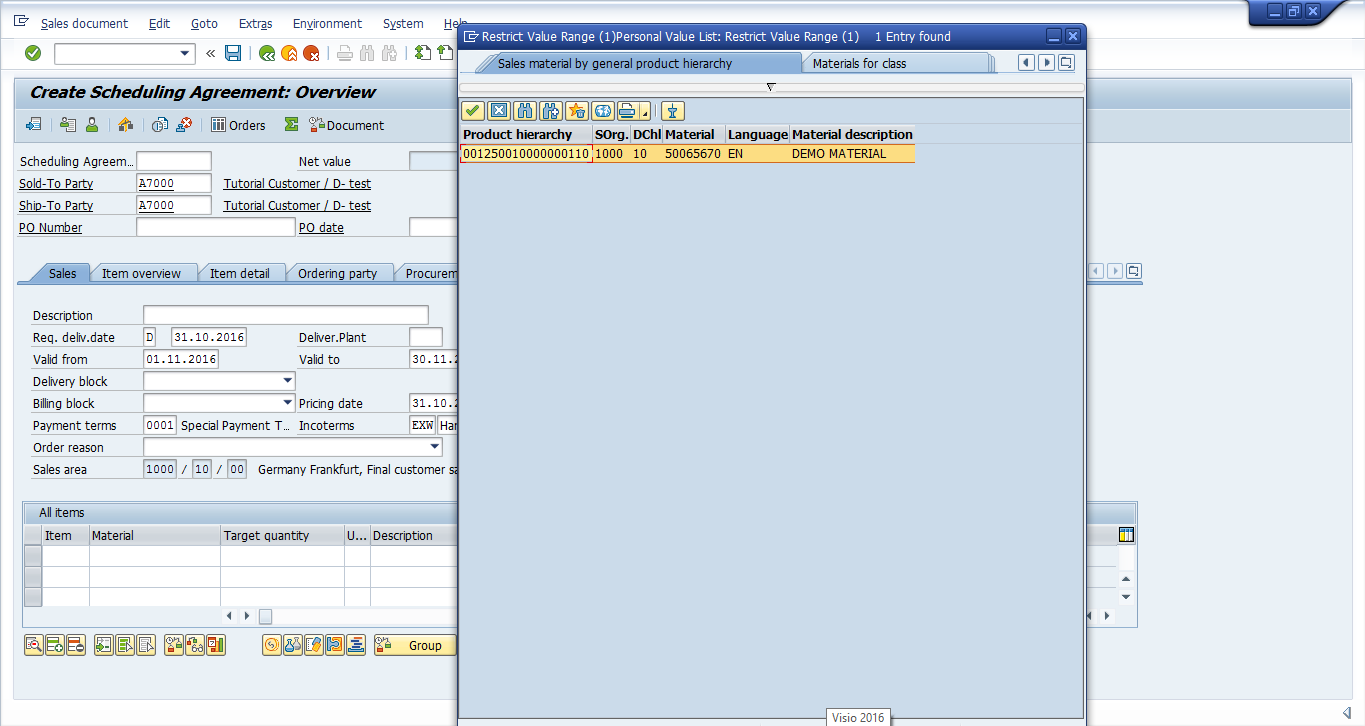
Double click on the desired material to select it:
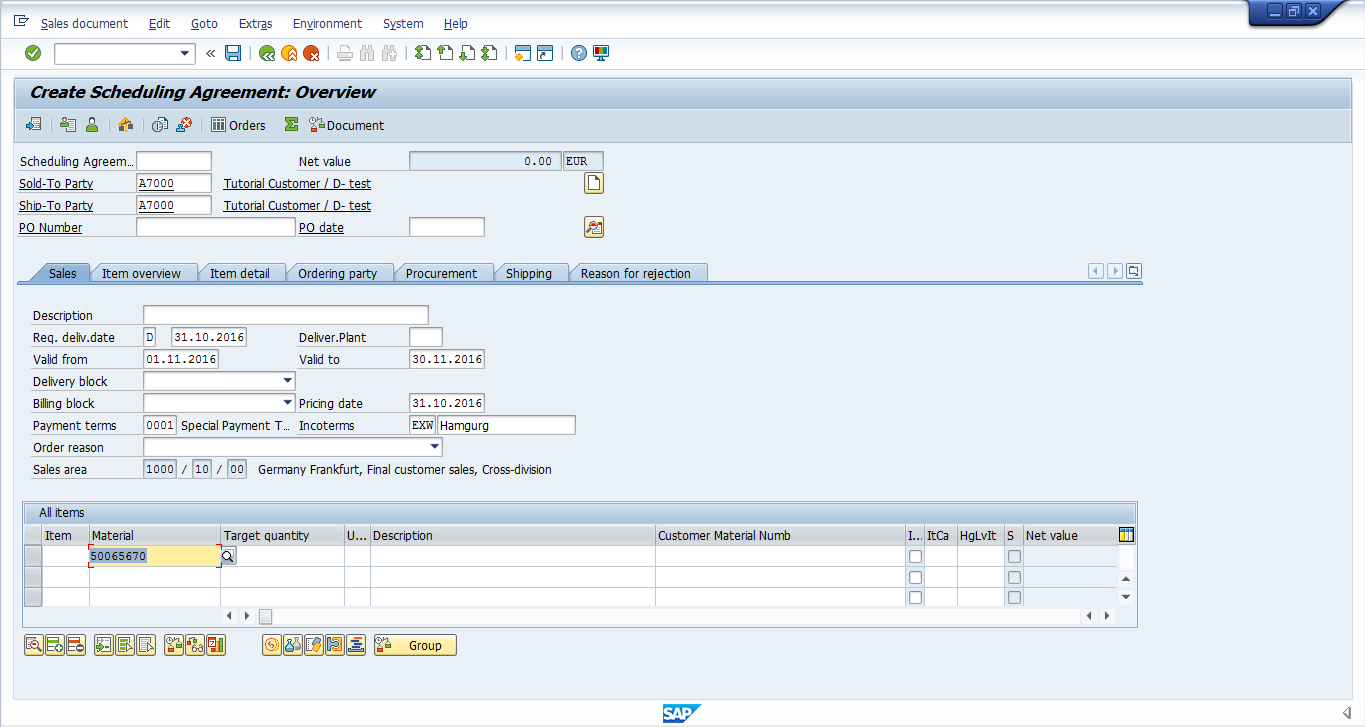
If you press Enter without entering the Quantity, the system will prompt:
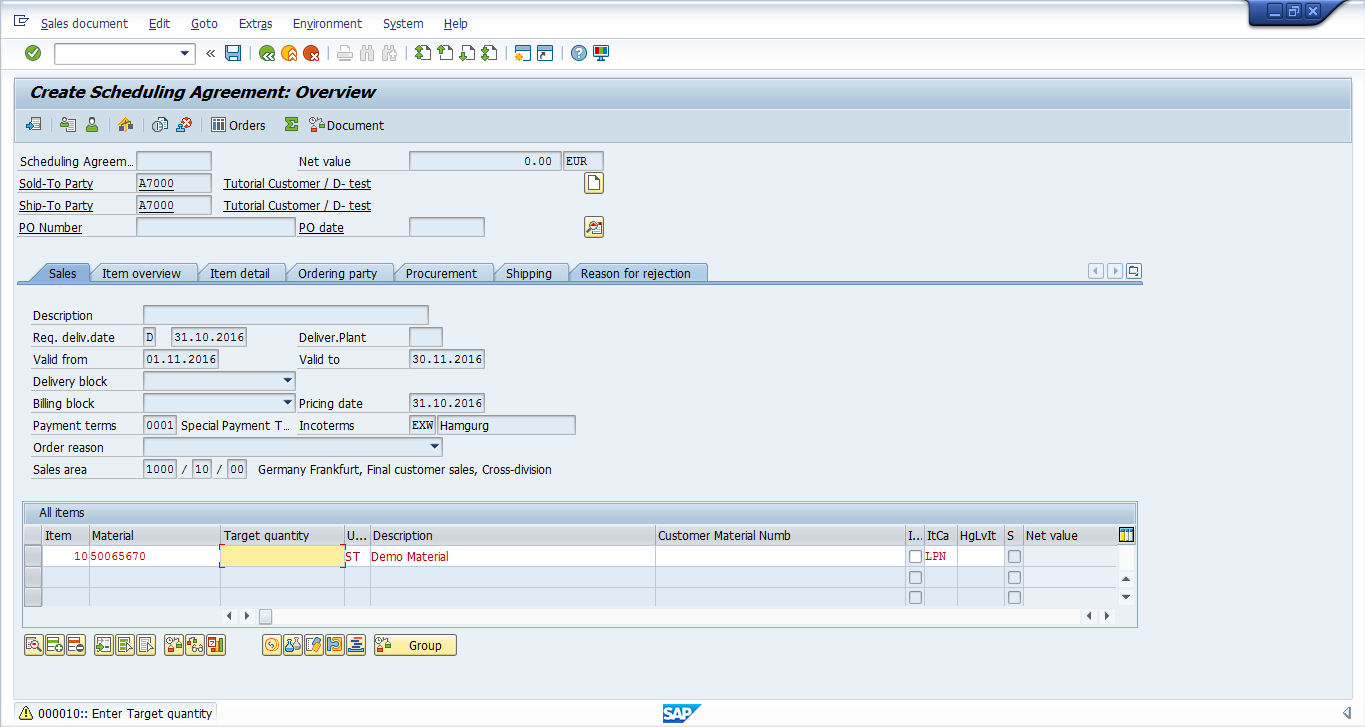
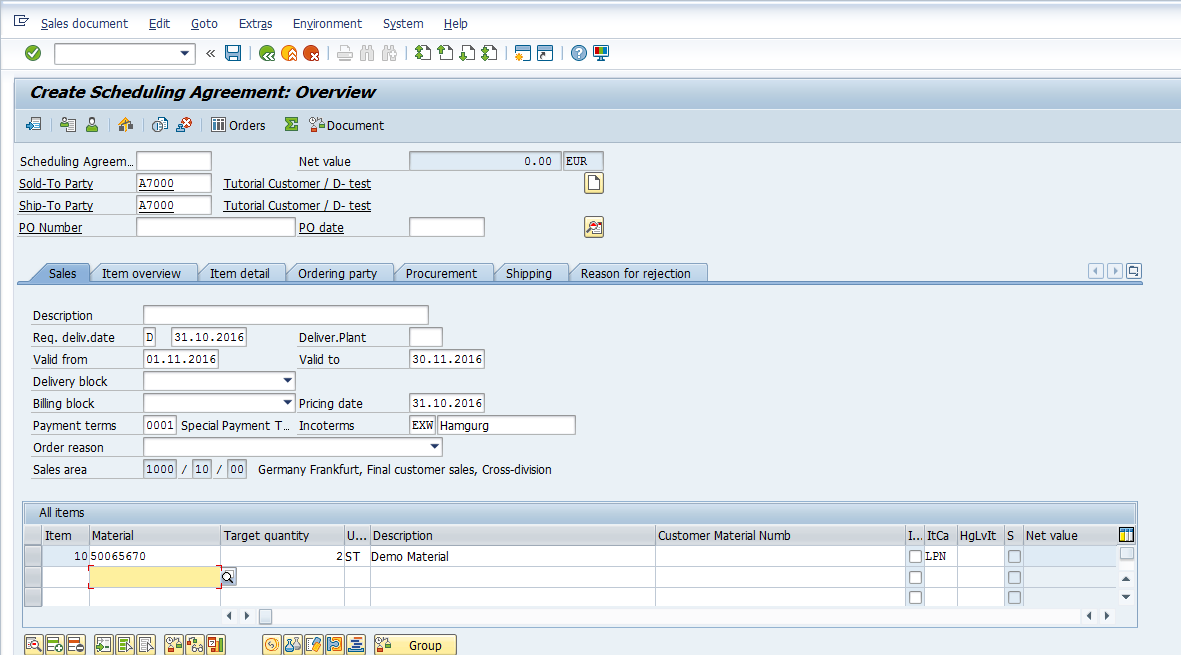
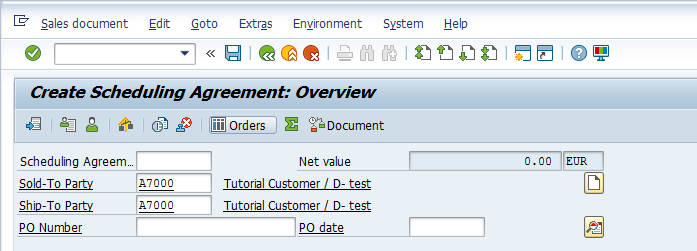
Here you can see that no value was updated in the Net Value field in the scheduling agreement’s header part:
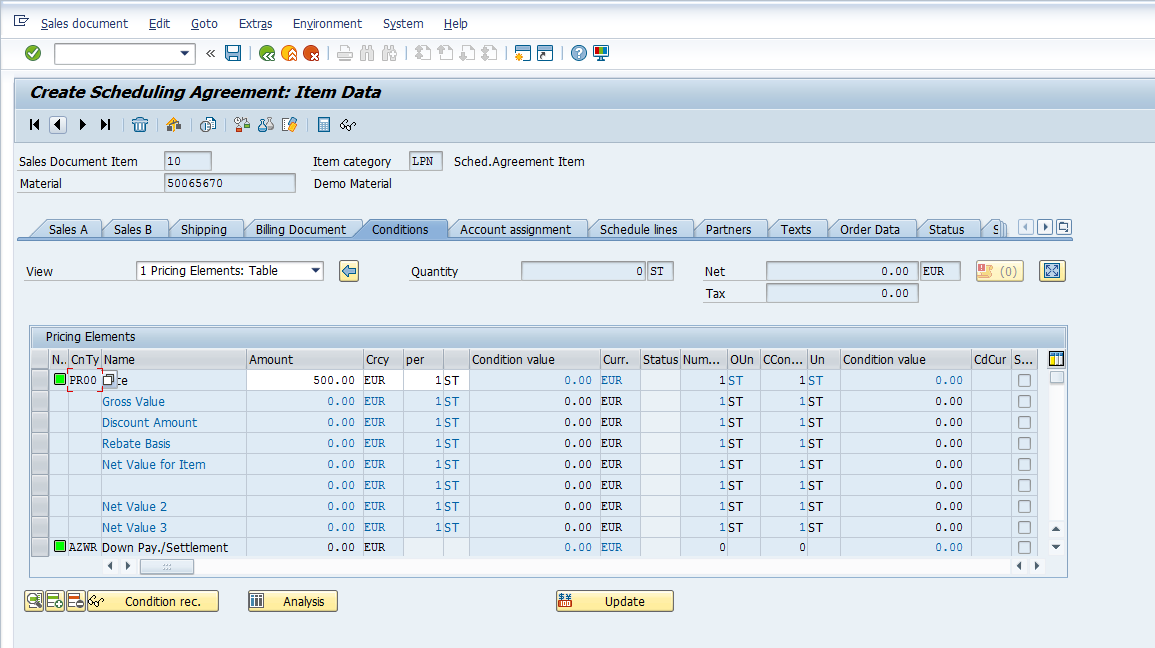
The same goes for the line item:

This is due to the reason that scheduling agreements require the schedule line to be populated. Select the relevant line item and press button in the line item section of the scheduling agreement:


Then, go to the Schedule Lines tab :
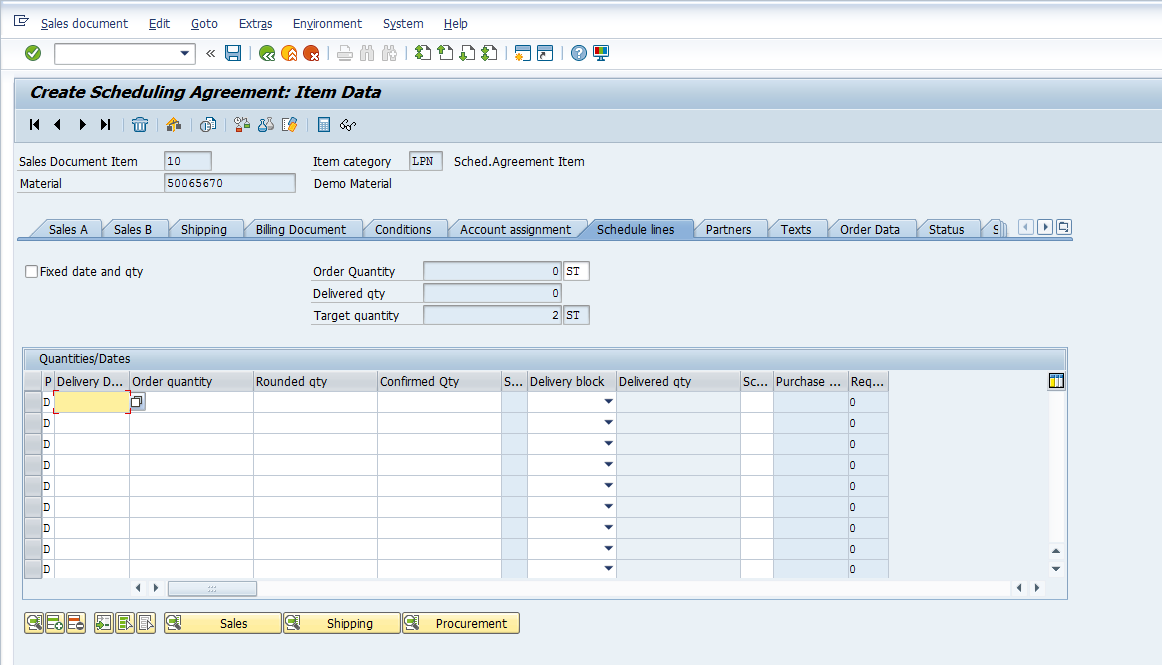
Enter the dates on which the customer has requested the goods along with the order quantity.
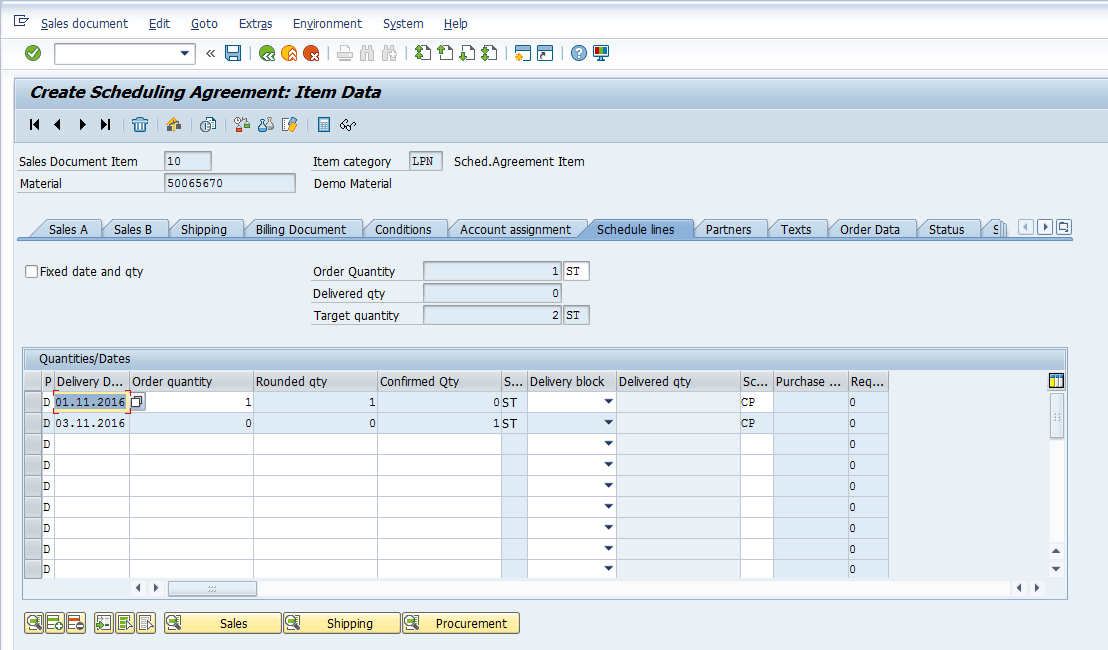

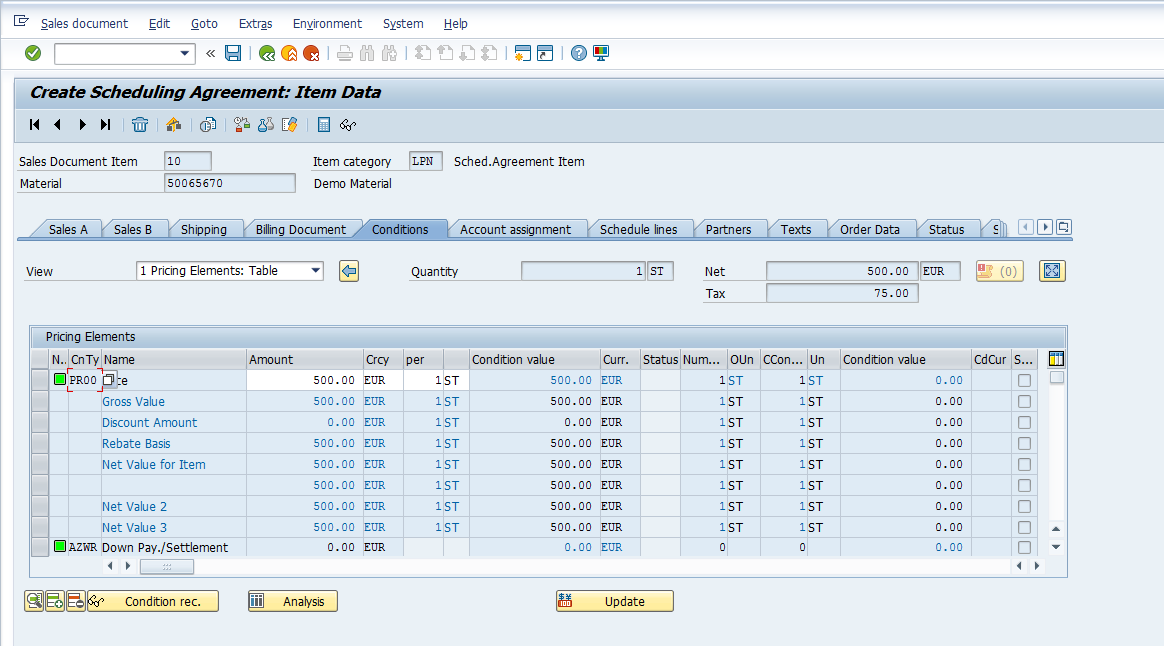
Once one schedule line it entered, conditions will update. Go to the Conditions tab in the line item data :
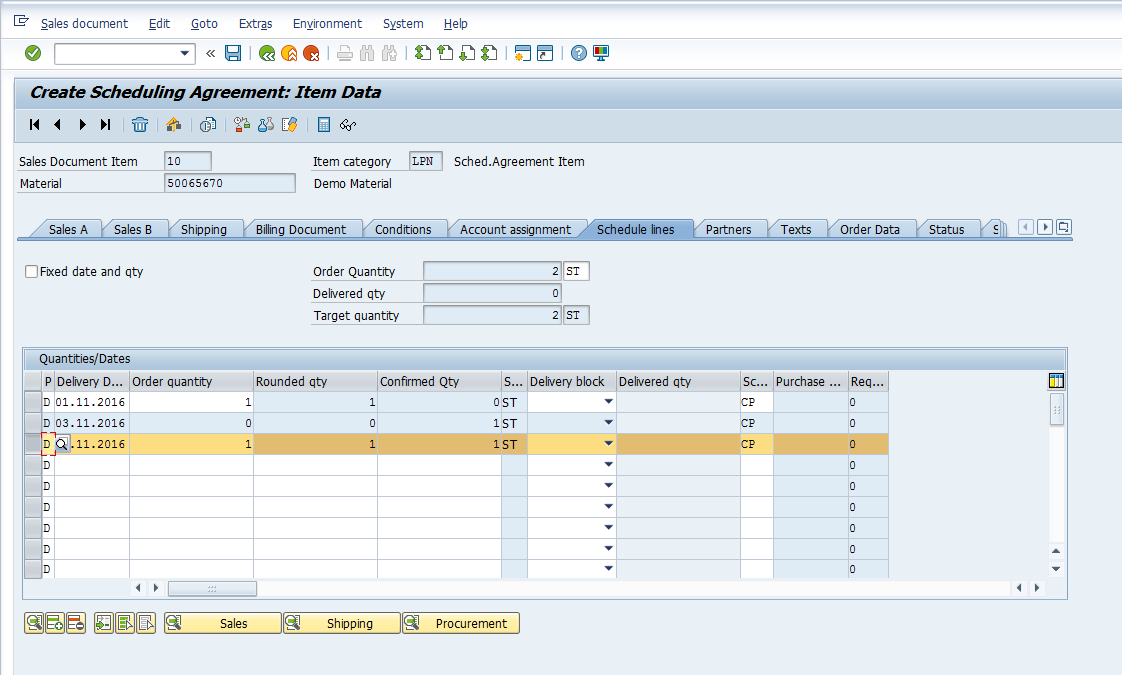
Enter another delivery date and quantity:
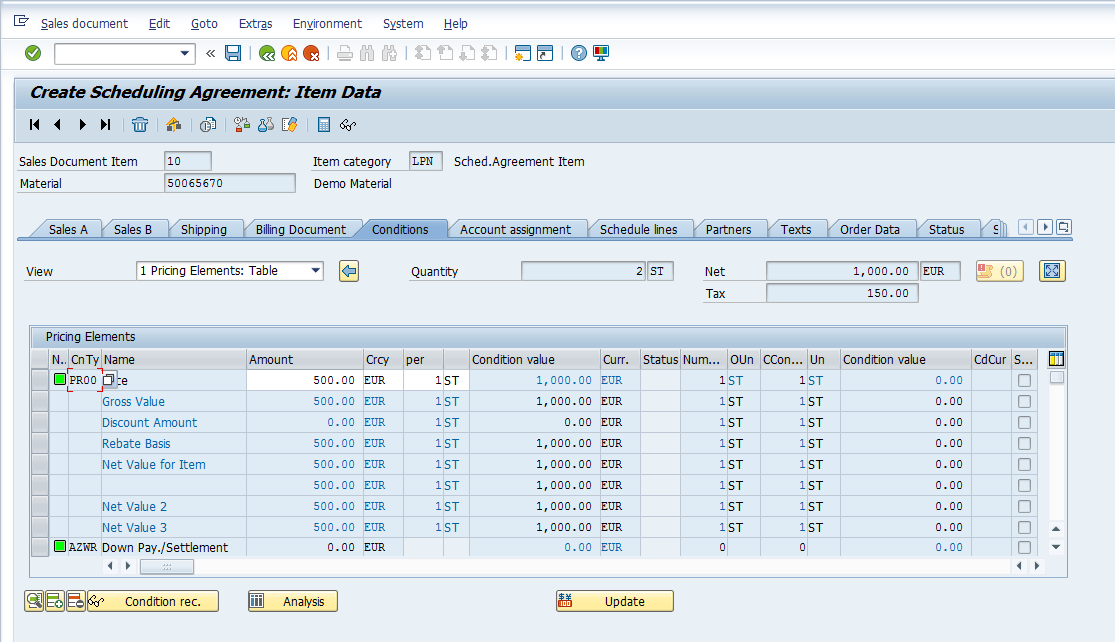
Conditions are updated accordingly in the line item pricing data:

Press F3 or to go back to the main screen. Go to Edit > Incompletion Log or Ctrl+F8 to see if the scheduling agreement that we have just created is complete.
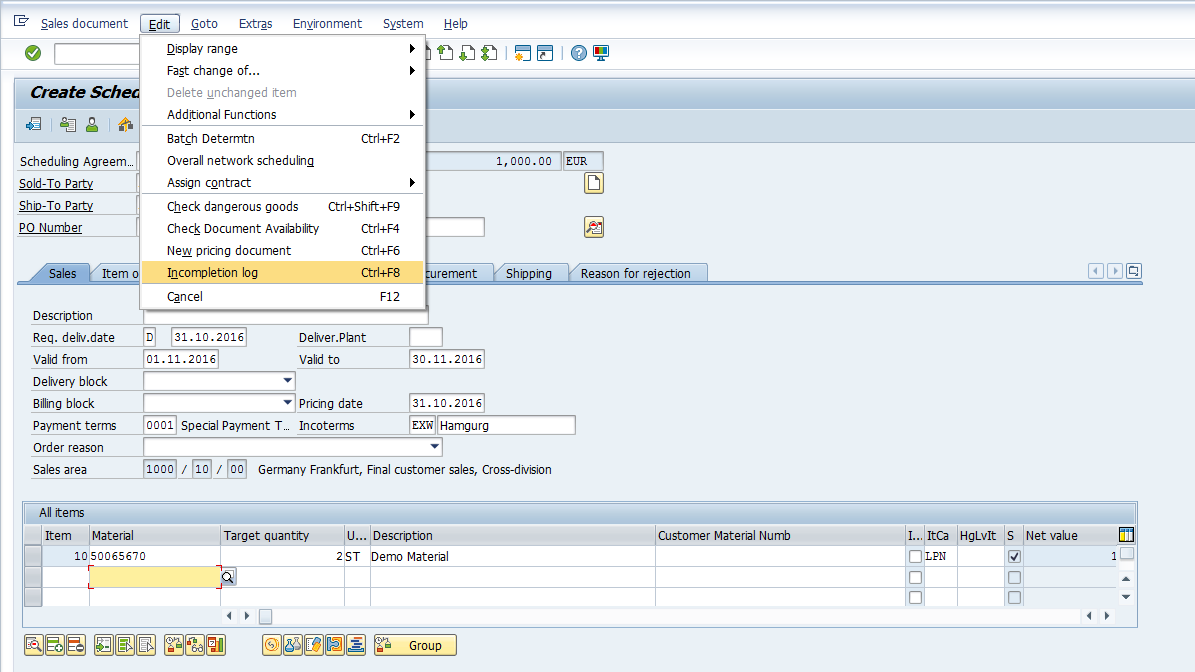
If there are any fields which need to be populated, the system will prompt and a new window will be displayed:
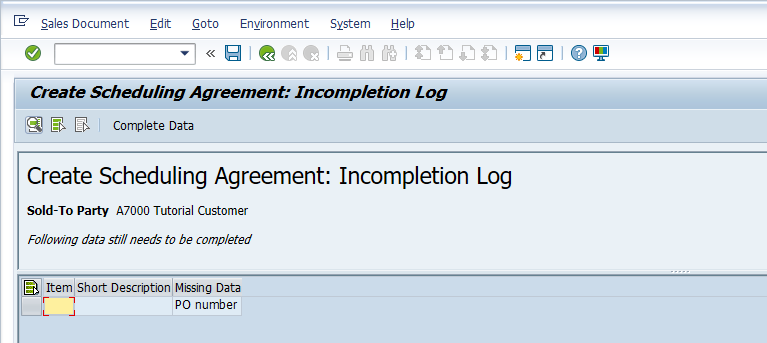

Press or F2 to complete the missing data:
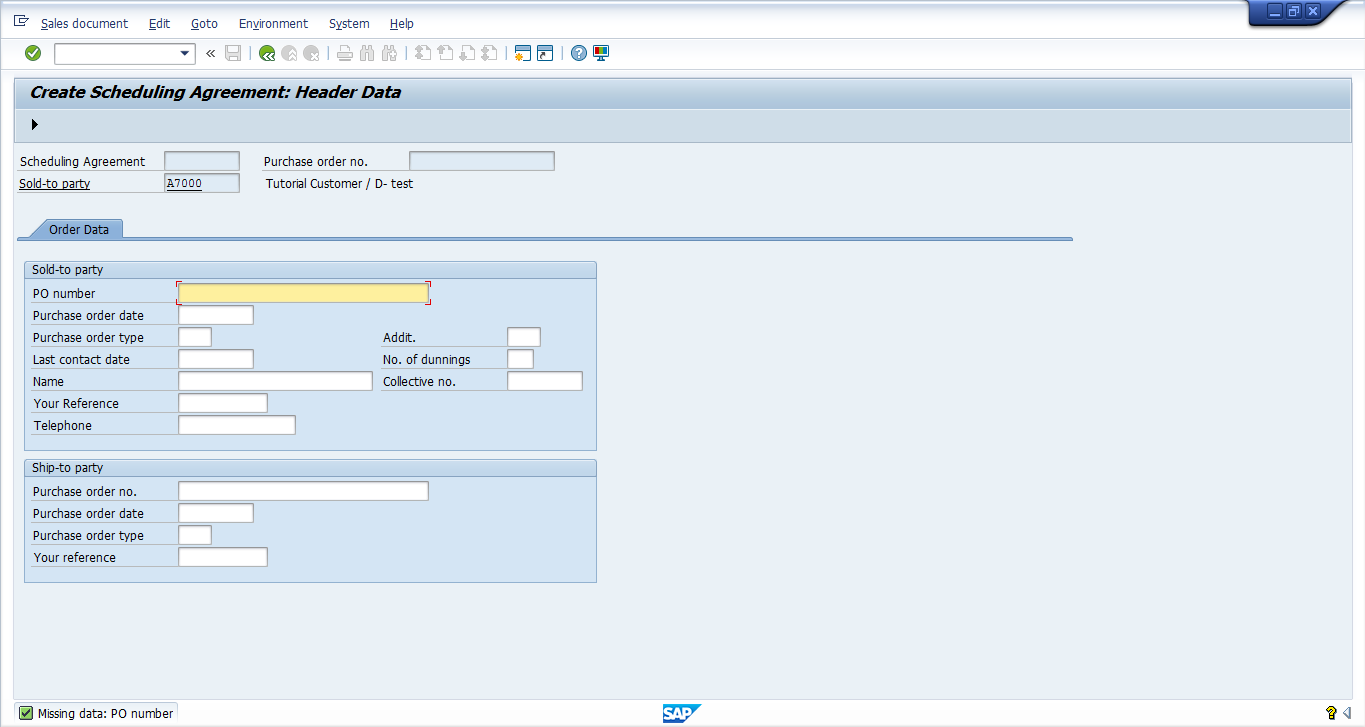
Enter the PO Number:
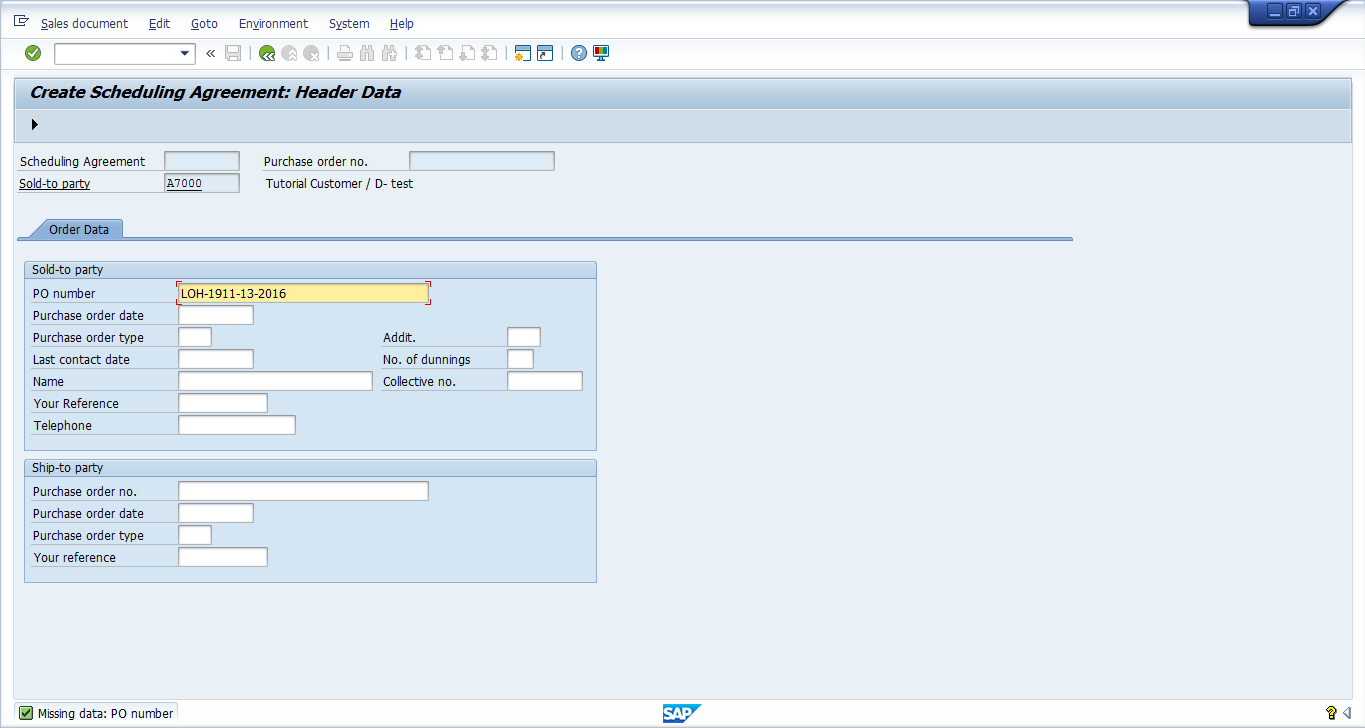
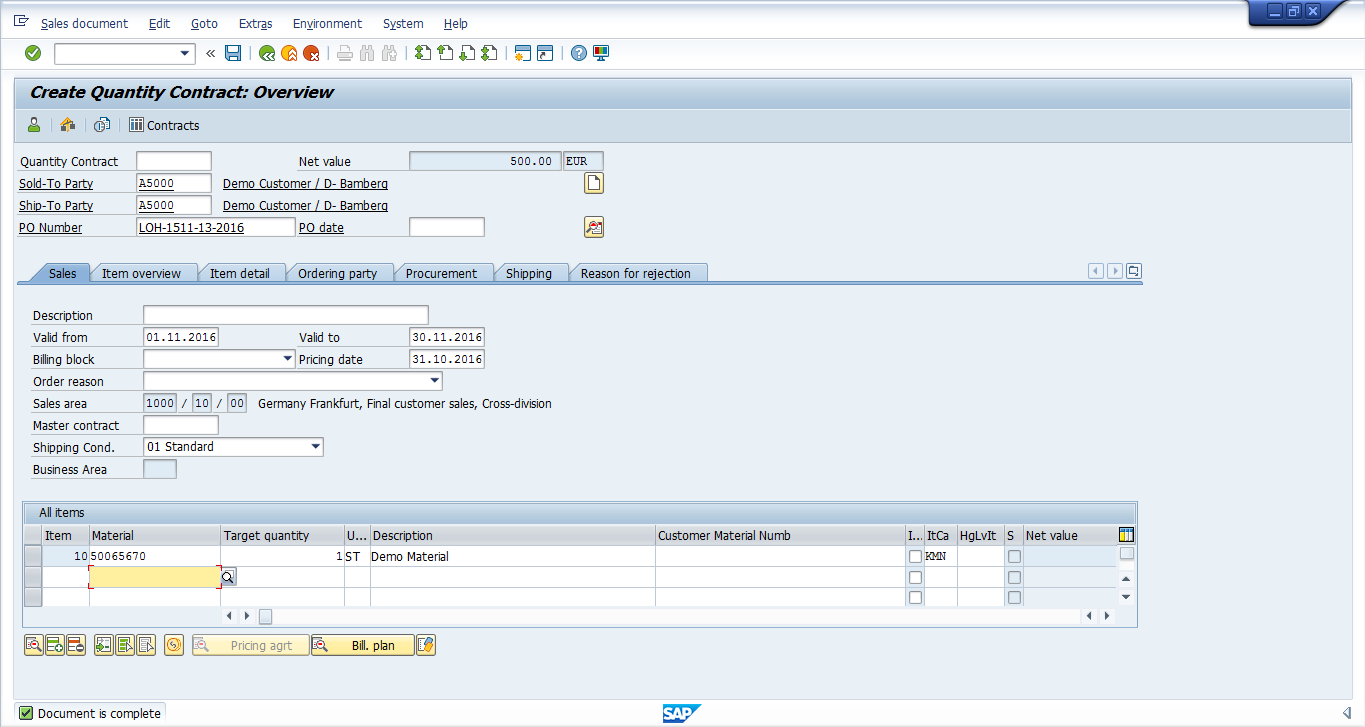
Press  or F5 to populate the next missing field, if any. Once all the required data is populated, the system will take you to the main screen of the scheduling agreement. If the document is complete, the SAP system will show the relevant message accordingly:
  .
.

Press button to view header details in the scheduling agreement:
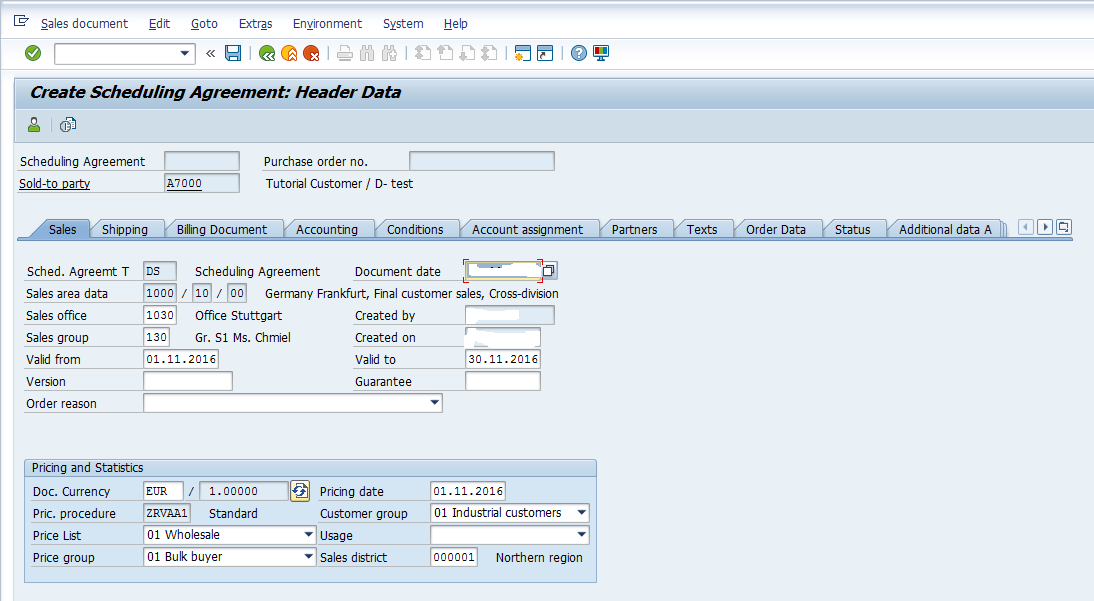
Here you can see the relevant header data:

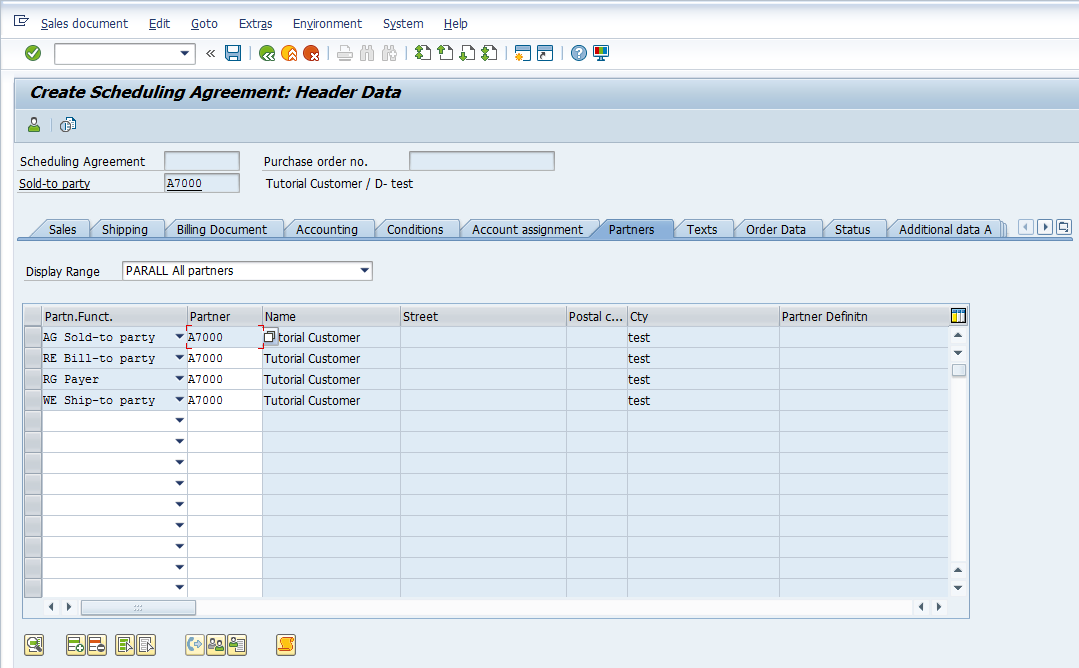
Press tab to see the partners which the customer is having:

Press to know the current status of the scheduling agreement:
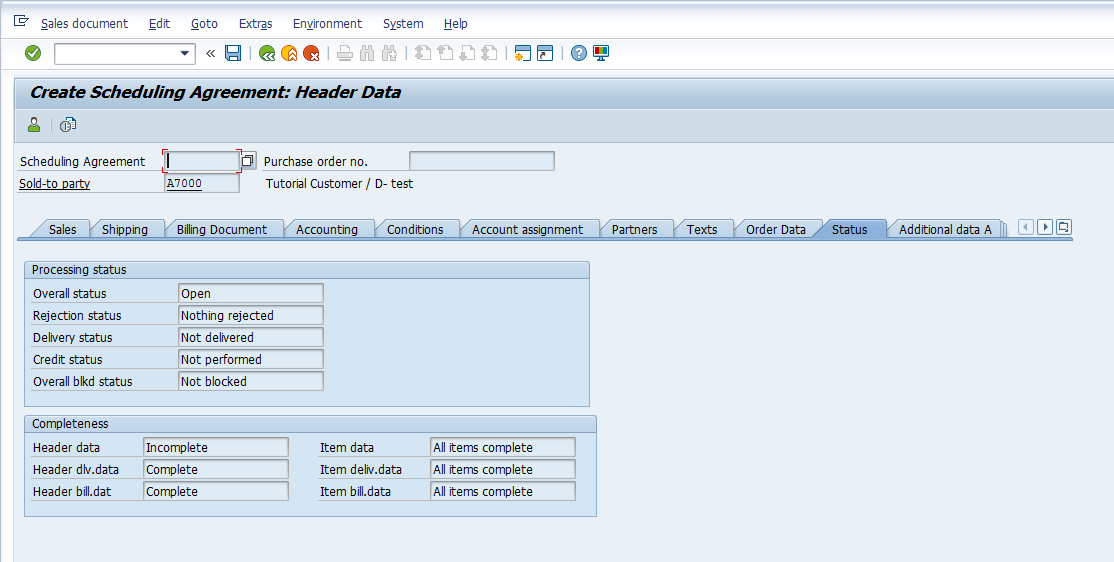

Press to go back to the main scheduling agreement screen.

Once you have created the scheduling agreement and are satisfied with the information populated, press or CTRL+S to save the scheduling agreement.
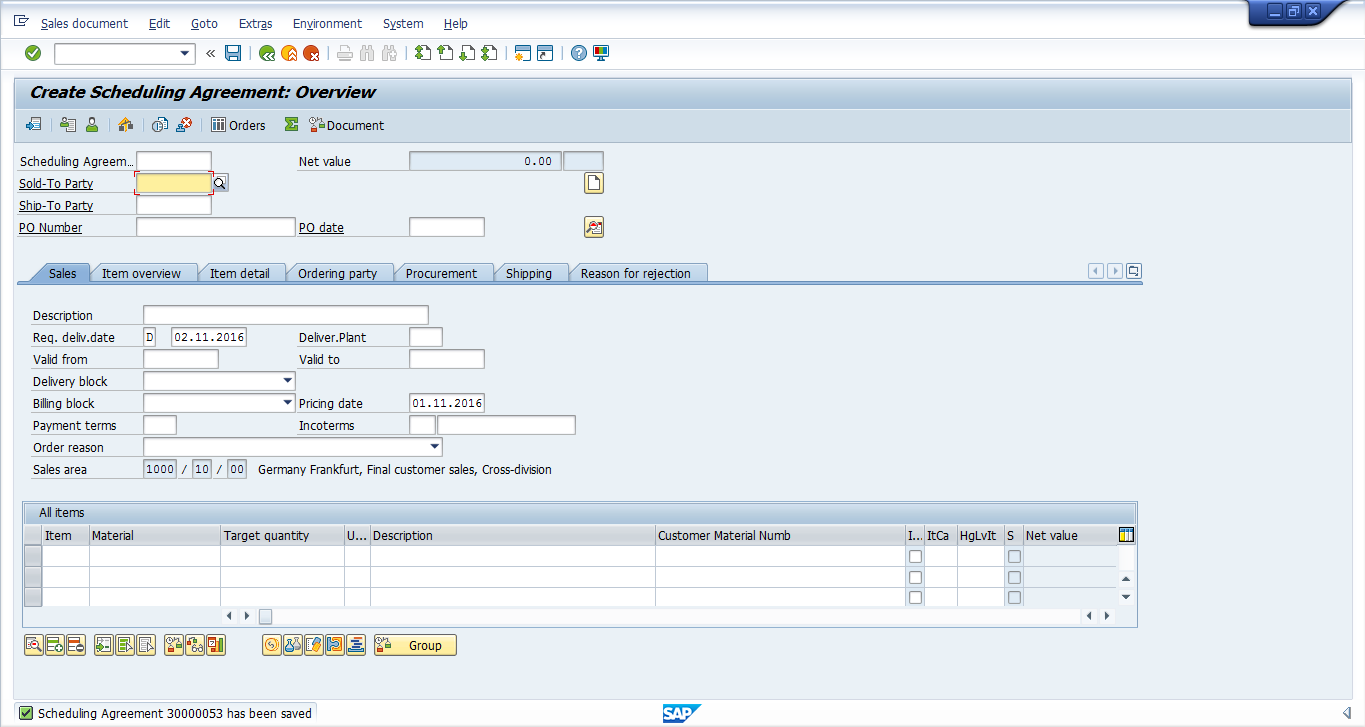
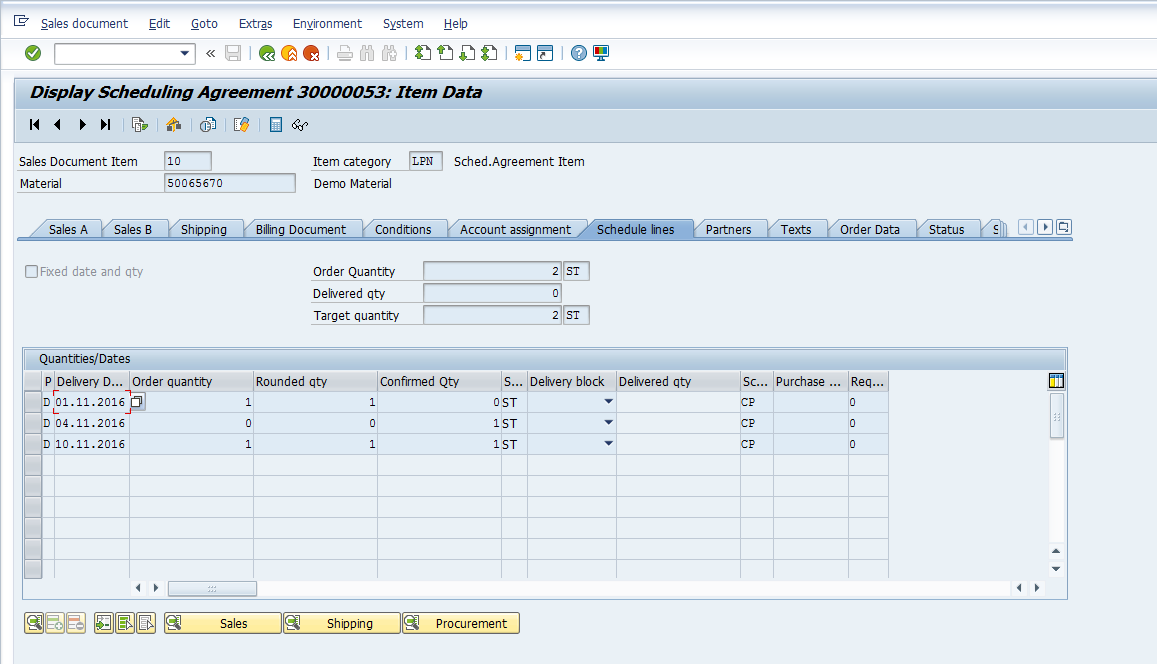
Since the scheduling agreement contains the delivery dates and quantities, deliveries are created based on the delivery quantity. Let us see the delivery details in scheduling agreement first:
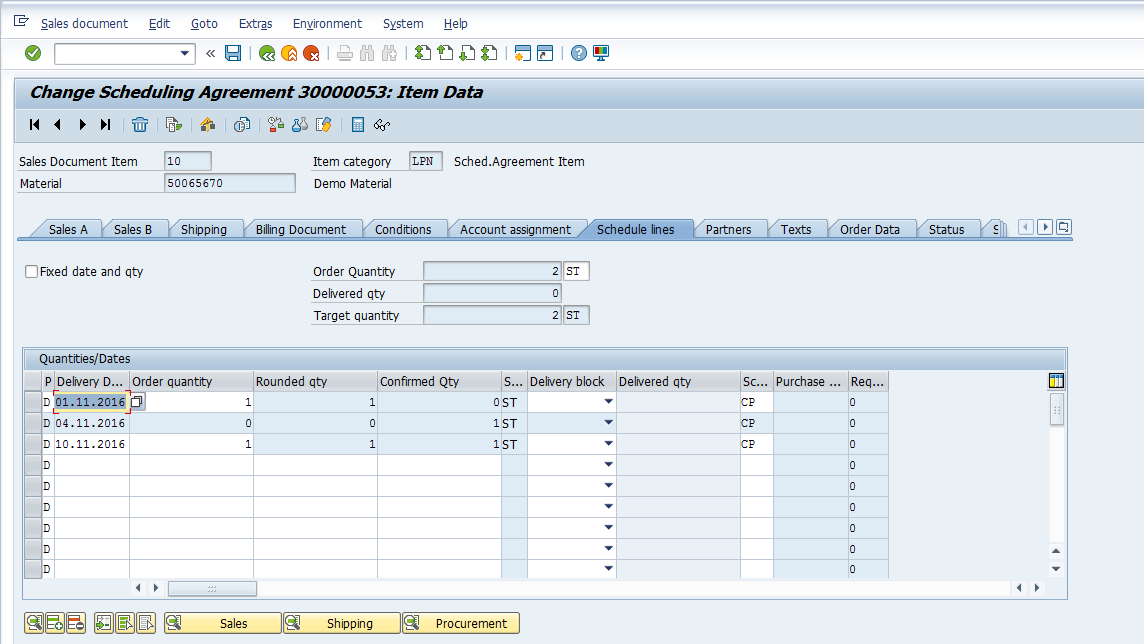
Customer requested the delivery of 1 quantity of goods on 1st November, 2016 but the system confirmed the delivery of goods on 4th November, 2016 based on the availability settings. This means that delivery can take place on 4th November, 2016 and not before that.
Similarly, the customer requested for the delivery of another 1 quantity of goods on 10th of November, 2016 which system confirmed.
Now, let us go to the delivery monitor and due list using the transaction VL10A:

Enter the relevant Shipping Point, Delivery Creation Date(s) and Sold-to Party:
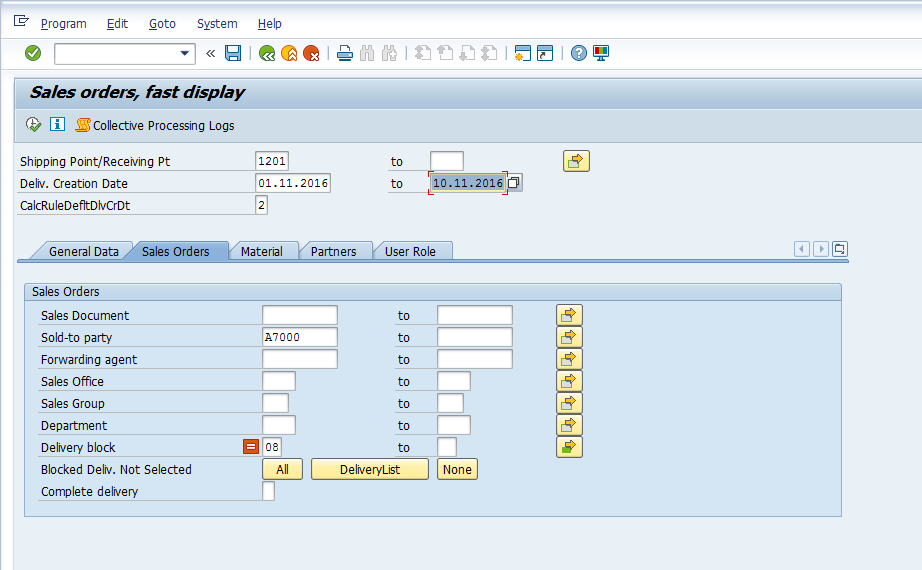
Now, the system should show two deliveries required to be delivered on the following dates based on the schedule lines maintained the scheduling agreement:

Press F8 or to execute the Delivery Due List:

Here you can see that the Ship-to Party A7000 has two deliveries that are against the scheduling agreement number 30000053 which we created earlier. These deliveries are due on 4th November, 2016 and 10th November, 2016 respectively.
Did you like this tutorial? Have any questions or comments? We would love to hear your feedback in the comments section below. It’d be a big help for us, and hopefully it’s something we can address for you in improvement of our free SAP SD tutorials.
Navigation Links
Go to overview of the course: Free SAP SD Training
Page last updated by Cleo Isco on November 30, 2016Well written tutorial. A few suggestions/queries:
* menu path to VL10A would assist as it’s totally different to other SD tutorial menu paths.
* a bit more explanation on the delivery due list would help – ie the delivery on the 10th shows as green (which I presume denotes completed) while the one on the 4th denotes amber (which I presume is in progress).
* how did the line item for the 4th appear in the Scheduling agreement. This part is not clear. Did the system input it?
Thanks for the comments! We will try to add some more details to this tutorial. I’d also highly recommend you to practice in a real SAP system. It really helps to understand how SAP works when you can see system responses to your input.
Dul says: Hi Cleo, do you do any online classes for SD? FRANCIS.R says:Hi,
am studying SD through a consultancy,I was not familiar with the sd concepts even after 3 months of learning, But as I started to refer your forum for most concepts and configuration, I was amazed by the way of your teaching and explaining with examples is just amazing and I refer your forum at most for most of my sd sessions. Good work. Best wishes.
Great tutorial! It would be wonderfull to have more explanation on how the systems determines for the schedule lines the first possible date to deliver the goods. Another question that comes to my mind and I guess is kind of related to the first point…its how do you know which is going to be the shipiping point? Because you know you have stock on a plant assigned to that shipping point? Thanks for the tutorial!
Abdul Basith says: it would be great that if you could share the config documents also for the same. seas_usa says: I am still waiting for explanation of Green and Amber lights in delivery . Ravi says: Very useful and helpful for the SD folks. Each and every pin to point has been explained. kunu parija says:Hello All,
its a very good forum to learn sap subjects, thanks for user full configuration steps and explanations of each and very topics. its was very useful for me to understand the subjects. Thanks
kunu